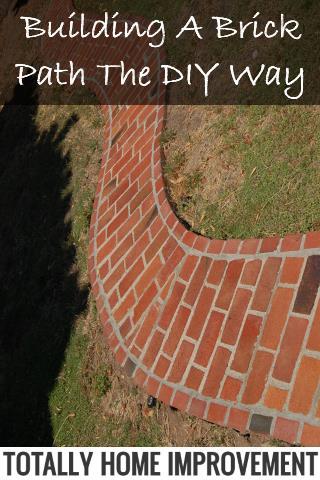
When it comes to masonry materials, brick is perhaps the most popular among the lot. Its appeal lies in its charming aesthetic, durability and sustainability. It is also energy efficient and virtually maintenance free.
For the home, there are a number of improvement projects wherein brick makes for a suitable material of choice, including walls, exterior siding, fireplace surround and chimney. However, it has always been best known as the material for building paths or walkways. And a brick path is one project that is well within your ability.
Take note, however, that while a brick pathway is a great DIY project, it is critical that you do the job right to ensure that it will last for decades. So if you are thinking of constructing one in your garden, follow the steps below to make a brick path that is both stylish and hard-wearing.
Mind Your Brick Choice
Know that not all bricks are created equal. Some outperform others in terms of aesthetics and durability. So it is crucial that you make the right choice as it will have an impact on the long term performance of the path.
Choose bricks that have severe weather rating. More popularly referred to as clay pavers, they are made to withstand the seasons and are also capable of taking a lot of foot traffic without cracking. Also, pay attention to the colour of the units. You want to make sure that they go well within your landscape so that your path will not stick out like a sore thumb.
Plan Accordingly
Many homeowners commit the mistake of building a brick path that is too small because they failed to take the right measurements. Some bricks paths also suffer from pooling water because they are either placed in the wrong location or not properly sloped making them unable to properly shed water away from the surface. To avoid these pitfalls, be sure to plan for your brick path accordingly. A well designed path is between 3 and 4 feet wide, letting two people walk comfortably side by side and should slope slightly to one side–1/8 inch per foot across the path’s breadth.
Once you have determined the right dimensions and slope, mark the location of the path using a white spray paint or two hoses and clean out the area by removing the turf either by hand or with a sod stripper.
Install Properly
Brick installation can be laborious, so you need to make sure that you approach the project realistically. While many homeowners consider this as a weekend project, it is not necessary that you follow a similar time frame, especially if you do not have an experience in doing brickwork. However, if that is your goal, it is a good idea to prepare well in advance to avoid delays and reduce labour. This means, you need to prepare your tools and materials and keep them as close to the work site as possible.
When everything is in place, the next step is to get the actual installation started. You can follow the steps below.
Excavate
A good brick path should have a 4-6 inch base and an inch of sand topped by bricks. So that means you need to excavate the site you have marked to about 8-10 inches in total. Refrain from digging too deep as doing so will create pockets of soft soil underneath the path which can result for dips to develop.
Add and Compact the Base
Evenly spread at least a 4-inch base of aggregate over the excavation and pack it thoroughly. Tamping would work just fine for a small path, but for a larger path you may want to use a compactor to properly level the material.
For best result, consider applying the base of aggregate, compact it and then apply the rest and level it again. Then, with a rake, fill in the low spots and continue compacting the entire area until it is even. Adding a layer of landscape fabric over the compacted base before you add the sand will help make the path become more stable.
Edge it
An integral part of any brick path installation is the border or edging that will define the perimeter of the paving. Use plastic edging and hold it in place using stakes.

Spread Sand
With the base firm and edging in place, you are ready to cover the surface with an inch of coarse sand. Starting where you want to begin laying the bricks, add two lengths of 1-inch PVC pipe a few feet apart from each other. Then spread the sand over this area and screed to smooth the surface using a piece of straight board. Avoid compacting the sand as the bricks will set better if the sand is loose.
Lay the Bricks
Start laying the bricks one at a time in your desired pattern. To ensure that the surface is even, use a level to spot the bricks and lightly tap the ones that are higher than the others using a mallet. Continue placing the bricks and save some pieces to use as your edging.
Tuck the Bricks In
When the complete width of the path is done, spread a light layer of sand over the surface and tamp the path down using a plate compactor. Finish your work by sweeping the sand to fill the joints between the bricks.
You might also like to read:
• Glow in the Dark Paving
Category:


